Tuesday, July 10, 2012

A folder failed to be renamed or moved. On Windows this typically means that a program is using that folder (for example Windows Explorer.) Please close all running programs that may be locking the directory.

Solution for this type of error in the android SDK installation and upgradation of tools .

Here we instead of runing installtion from eclipse we need to it from outside from command promt.


Steps:

1.Close Eclipse and close all instances of windows explorer in which the android application is running .

2.open the tools folder in android-sdk folder  Eg:  "D:\android\android-sdk\tools"

3.Now run AVD manager independently from command promt  with the following commands


4.  Go to the directory where android sdk is installed at, and then its tools subdirectory.
  • Run Android.bat.
  • At this point, update just as you would if you were running the AVD Manager from within Eclipse (make sure the proxy settings are mentioned if you are behind the proxy).

5.Install all the packages you want and enjoy your work ..............Now it will work fine .


Saturday, March 31, 2012

Setting up Google Maps in Android development.


First to generate the google maps we need to have googleAPI's jar .
next the main.xml file will be like this

 <com.google.android.maps.MapView
        android:id="@+id/mapView"
        android:layout_width="fill_parent"
        android:layout_height="fill_parent"
        android:enabled="true"
        android:clickable="true"
        android:apiKey="07U1v4ybO9ld4IUYE6s1mzC867e9U9xLOm3lDDw"
        />


here ApiKey is genereted from the google maps site   http://code.google.com/android/add-ons/google-apis/mapkey.html

 Before that you need to generated the MD5 finger print .

This can be generated like this

Go to your WindowsPreference --->Android --->Build --->Copy the path from Default Debug keystore
It is looks like C:\Users\Maazeed\.android\debug.keystore .
Now in commad prompt we need to run the below following lines.
To get MD5 Finger print send the path of debug keystore.


keytool.exe -list -alias androiddebugkey -keystore "C:\Users\Maazeed\.android\debug.keystore" -storepass android -keypass android 


Now you get the MD5 Finger print  similarly like this

MD5 Finger print :
5F:52:33:3A:CF:66:F0:C5:2B:9A:6F:BE:EF:2B:A5:DF

Here we go we need copy and paste the sequence in this link
http://code.google.com/android/add-ons/google-apis/mapkey.html

Now you will generate the ApiKey .That looks like this .

Key generated :
07U1v4ybO9ld4IUYE6s1mzC867e9U9xLOm3lDDw

This is the APIkey you seen in first para of the discussion.

Now you can play what ever you want with the code.


/AndroidRuntime(673): java.lang.RuntimeException: Unable to instantiate activity/java.lang.ClassNotFoundException/oader dalvik.system.PathClass

I found this problem in android development because when we not include library files properly in manifest.xml.

java.lang.ClassNotFoundException


 java.lang.RuntimeException: Unable to instantiate activity

we need to set the library tag at proper place in the manifest file.
we can solve this problem by setting the <uses-library> under the application tag.

see the example below if we place the <uses-library> tag out of <application> then it causes error i stated above.


Example: The example works fine .

<?xml version="1.0" encoding="utf-8"?>
<manifest xmlns:android="http://schemas.android.com/apk/res/android"
      package="com.zen.mobile"
      android:versionCode="1"
      android:versionName="1.0">
    <uses-sdk android:minSdkVersion="8" />
    <uses-permission android:name="android.permission.INTERNET" />
  
   
     <application android:icon="@drawable/myapp_1" android:name=".AppointmentApplication" android:label="@string/app_name">
         <uses-library android:name="com.google.android.maps"/>
        <activity android:name=".WelcomeScreen" android:label="@string/app_name">
            <intent-filter>
                <action android:name="android.intent.action.MAIN" />
                <category android:name="android.intent.category.LAUNCHER" />
            </intent-filter>
        </activity>
        <activity android:name=".AddCourse" android:label="@string/app_name" />
        <activity android:name=".RemoveCourse" android:label="@string/app_name" />
        <activity android:name=".ViewCourseMap" android:label="@string/app_name" />
    </application>
</manifest>


if you cause error even doing like this than make some inter change of <uses-library> at different ways.

Thursday, October 20, 2011

Android HoneyComb emulator facing performance issues


I have observed the Android 3.0 Honeycomb emulator is very slow compare to the other version of emulator like mobile .Google have agreed that it has some performance related issues in it .As of for temporary purpose i have minimized the slowness.

Things i followed to improve the android 3.0 Honeycomb emulator performance.

1.Increase the RAM Size of your system to more than 2 GB and 1GB in emulator .
2.Increase SD card size .
3.Add  property in AndroidManifest.xml as android:hardwareAccelerated="true".
4.Clear the temporary files every day before you  start eclipse and Emulator.Because it creates a lot of files in temp and  occupies lot of memory in C drive .

I hope it will solve the problem some extend.................:)

Users Features of Android 4.0

Simple, beautiful, beyond smart

Android 4.0 builds on the things people love most about Android — easy multitasking, rich notifications, customizable home screens, resizable widgets, and deep interactivity — and adds powerful new ways of communicating and sharing.

Check more on this here Android 4.0 for Users

New Developer Features of Android 4.0 Version


Android 4.0 brings a unified UI framework that lets developers create elegant, innovative apps for phones, tablets, and more. It includes all of the familiar Android 3.x interface elements and APIs — fragments, content loaders, Action Bar, rich notifications, resizable home screen widgets, and more — as well as new elements and APIs.
For developers, the unified UI framework in Android 4.0 means new UI tools, consistent design practices, simplified code and resources, and streamlined development across the range of Android-powered devices.


Check the features here Android Android 4.0 Developer Features

Officially Unveiled Android 4.0 ice cream sandwich


Google and Samsung together unveiled the New Android 4.0 and level 13 which is very impressive and advanced compare to older version. It is completely mobile supported version. 


It has many new stunning features .

Simple, beautiful, beyond smart

Android 4.0 builds on the things people love most about Android — easy multitasking, rich notifications, customizable home screens, resizable widgets, and deep interactivity — and adds powerful new ways of communicating and sharing.

It Has Refined, evolved UI.
 You can read more on this here Android 4.0 User Guide


Wednesday, September 21, 2011

Android AVD Creation

Set up the AVD

Go to windows -> Android SDK and AVD Manager


 Click new


Give a name to the AVD and fill the other information as follows and click Create AVD


  After Create AVD you will see like this


Now you need to press Start and Lunch.
And Last but not the least RUN the Project ---> Run as Android Application.


This is how our first program look like


For Project creation See this link http://adroit-android.blogspot.com/2011/09/android-project-setup.html

Tuesday, September 20, 2011

Android Project Setup

Creating Android Project

Here we going to create Android project which will display Hello world message.
Enter Clt + N the new resource dialog will open, type Android and select Android Project


New project window will open enter the Project name select the Build target 2.2 or higher . Enter application name and package name.


Eclipse will create project with following structure


Android Project Structure

Src : This folder have all the java files
Gen : This folder contain R.java which is a android generated file . R.java contain id for all of the resources under the ‘Res’ folder which can be used in the java file to access those resources.
Res : Contains project resource files
Drawable : all the images and theme files store in this directory
Layout : This folder contain the xml files which having the screen layout.
String.xml : all the hard coded values are stored in this file. This is use full for multi-language

AndroidManifest.xml : This file have application lever configuration information. This file include declaration of all activities ,Services , User Permission , Screen orientation etc.


The main.xml will have the layout for the display panel which shows the Hello world message. The panel specify the main layout and a Text field in it which display the message.


In the above panel the TextField reading the message from the string.xml file the content of which will be look like bellow.


The Android generated R.java will look like this at this stage.


Android Activity life cycle.


 In the above diagram we can see that the onCreate method is the first method to execute. The layout for the activity has to specify in the onCreate method using the method setContentView(). Here you can see that how the android generated R class element used to refer to the resource file.


After completion of project creation we need to run the application , for that we need android AVD(Android Virtual Machine).The Procedure for Creating AVD........follow this Android AVD

http://adroit-android.blogspot.com/2011/09/android-avd-creation.html

Monday, September 19, 2011

Using link text or button in Android to redirect to url given

Using link text or button in Android

Here use the below code for link ,when clicked on the link or any linkItem it will redirect to the  page with given url .
Intent browserIntent = new Intent(Intent.ACTION_VIEW, Uri.parse(http://www.adroit-android.blogspot.com/));
            startActivity(browserIntent);

Wednesday, September 14, 2011

Android Environment Setup


This tutorial will help to set up the environment for Android ,give an idea of Android project structure and an example program to start with Android.

Set up Eclipse

1. Download Eclipse from http://www.eclipse.org/downloads/ and setup the Eclipse

2. Install Android SDK from http://developer.android.com/sdk/index.html select the .exe

3. Install the Android plugin for Eclipse

Go to Help -> Install New Software


Enter the plugin URL as https://dl-ssl.google.com/android/eclipse/
and click Add
 
Enter the plugin name and click OK. This will load all the components of the plugin
 
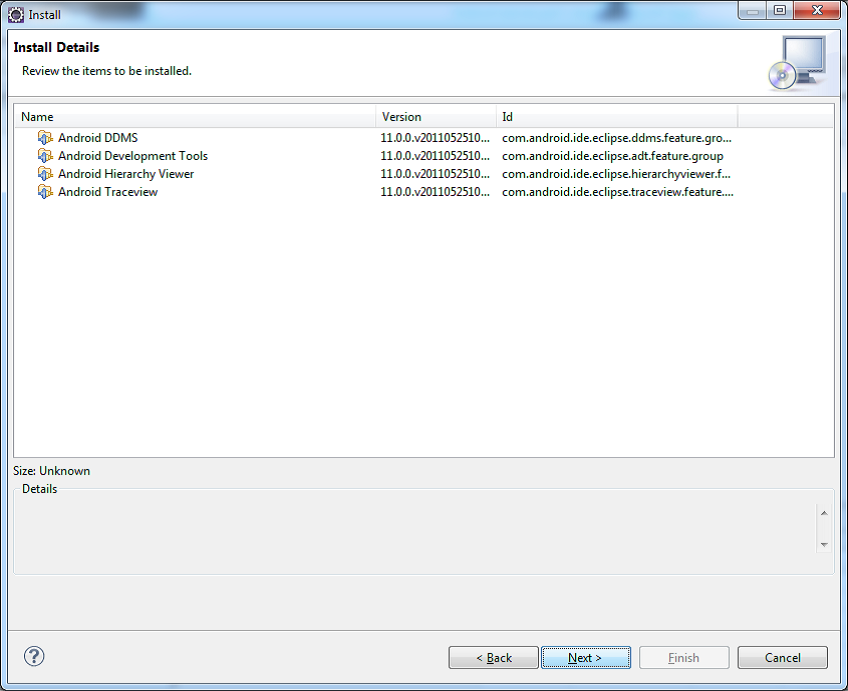
Click Select All and click Next
 
Click Next


Accept the license agreement and click Finish

 
Once the plugin installation finish it will ask to restart the Eclipse

Now loading an Android SDK in eclipse.

SetUp Android Environment 


Go to Windows -> Preferences.


Select Android from the left panel and in the right panel brows to the Android SDK location and click OK


Next Apply and Ok .